> ## Documentation Index
> Fetch the complete documentation index at: https://aitextura.mintlify.site/llms.txt
> Use this file to discover all available pages before exploring further.
# Bitrix24
> Bitrix24 integrates with AI Textura in two independent ways: as a channel (a source of messages from open channels) and as a talent (CRM operations via MCP). You can connect both at the same time.
What a channel is and how it works in AI Textura
A similar CRM with channel / talent split
Triggers and notification delivery to Bitrix24
Catalog of MCP tools and integrations
## Two ways to connect Bitrix24
Bitrix24 integrates with AI Textura in **two independent ways**. They do not replace each other and can run side by side:
| | **Channel** | **Talent** |
| ------------------------------- | ------------------------------------------------------------------- | ------------------------------------------------------------------------------------------------------------------- |
| Where it is configured | The agent's **Channel** tab | The agent's **Talents** tab |
| What it does | The AI receives and replies to messages from Bitrix24 open channels | The AI performs CRM actions: creates deals and leads, assigns responsible managers, schedules tasks, finds contacts |
| Technology | REST webhook for receiving messages | MCP server with CRM/Users/Tasks/Im/Imbot/Openlines permissions |
| Minimum permissions in Bitrix24 | Open Channels, Chatbots, CRM, Drive, Notifications | CRM, Users, Tasks, Chat & notifications, Chatbot creation, Open Channels |
In most cases you need **both**: the channel — so the AI can hear the customer; the talent — so the AI can qualify the lead and create a deal during the conversation.
***
## Connecting Bitrix24 as a channel
The channel is the path through which messages from Bitrix24 open channels reach the AI employee.
### What the channel provides
* The AI employee responds to messages from Bitrix24 open channels.
* All inquiries are automatically saved in the CRM.
* Managers can join the conversation at any time.
### Step 1. Create a webhook in Bitrix24
Sign in to your Bitrix24 account.
Open **Applications → For Developers → Other → Inbound webhook**.
Copy the **"Webhook URL for calling REST API"** field.
### Step 2. Connect the channel in AI Textura
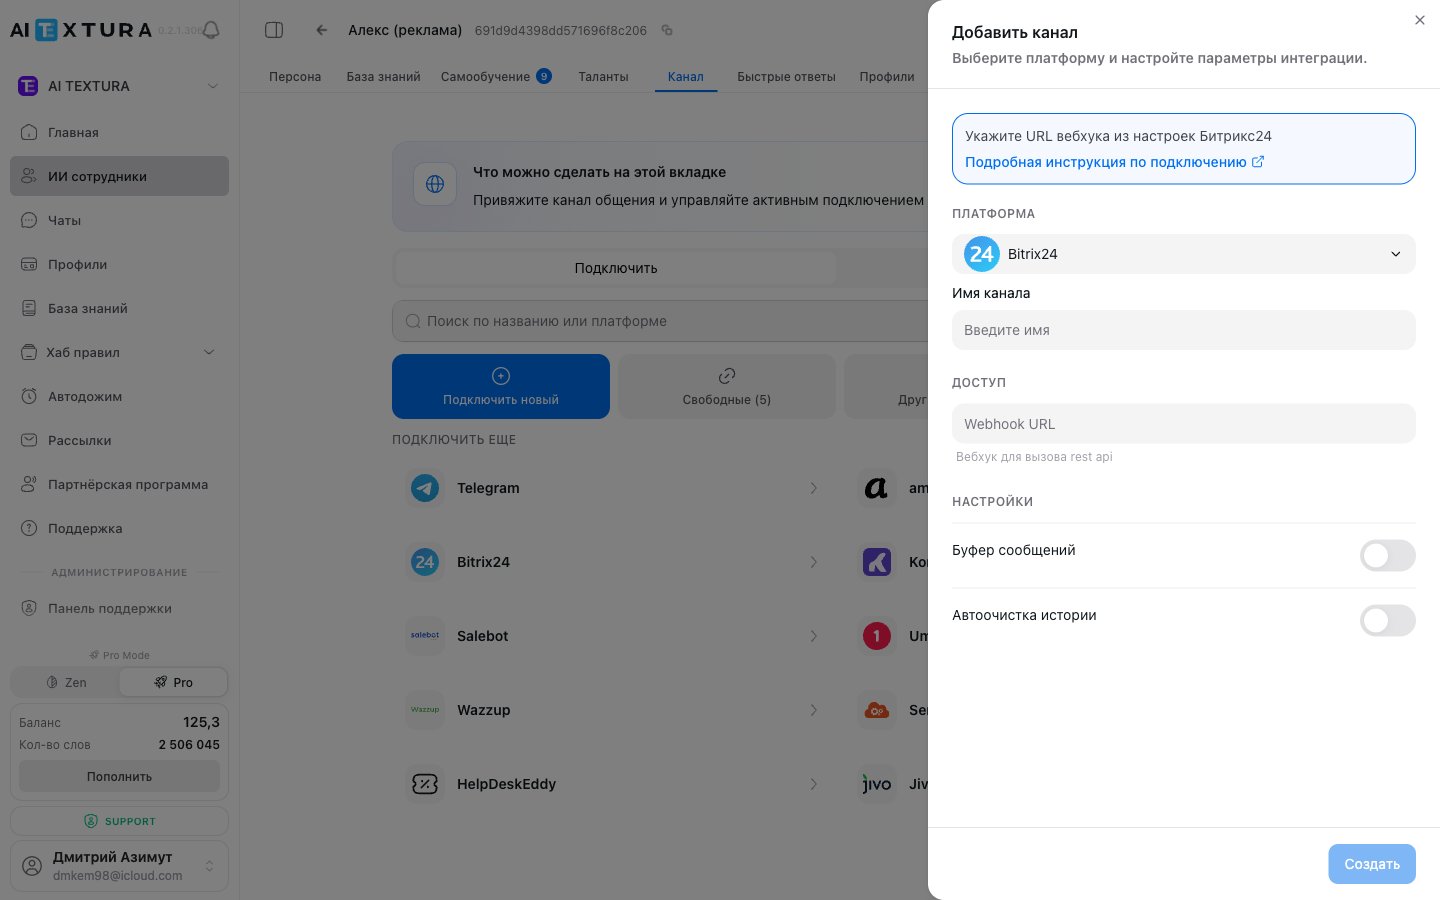
Go to [AI Employees](/en/guides/ai-employees) → select the agent → **Channel** tab → **Connect new** sub-tab.
In the platform list, find **Bitrix24** and click on it.
In the side panel, choose **Create** and paste the webhook address into the **WEBHOOK** field.
Go back to Bitrix24 and configure the webhook permissions. Required permissions for the channel:
* Open Channels
* Chatbot creation and management
* CRM
* Drive
* Notifications
Click **Save**. The channel will appear in the **Connected** tab.
### Step 3. Configure the chatbot in Bitrix24
After connecting the channel in AI Textura, configure Bitrix24:
1. Go to **CRM → Integrations → Messengers**.
2. Open the desired chat → **Open Channel**.
3. Enable the **"Assign chatbot as responsible"** checkbox.
4. Select the AI employee → **Save**.
After setup, send a test message through the open channel to verify that the AI employee receives and processes inquiries.
***
## Connecting Bitrix24 as a talent (MCP)
The talent is an **MCP server** through which the AI employee can perform actions in the Bitrix24 CRM: create deals and leads, find contacts and companies, schedule tasks, **assign responsible managers**, and send messages to Bitrix24 chats.
### Two connection options
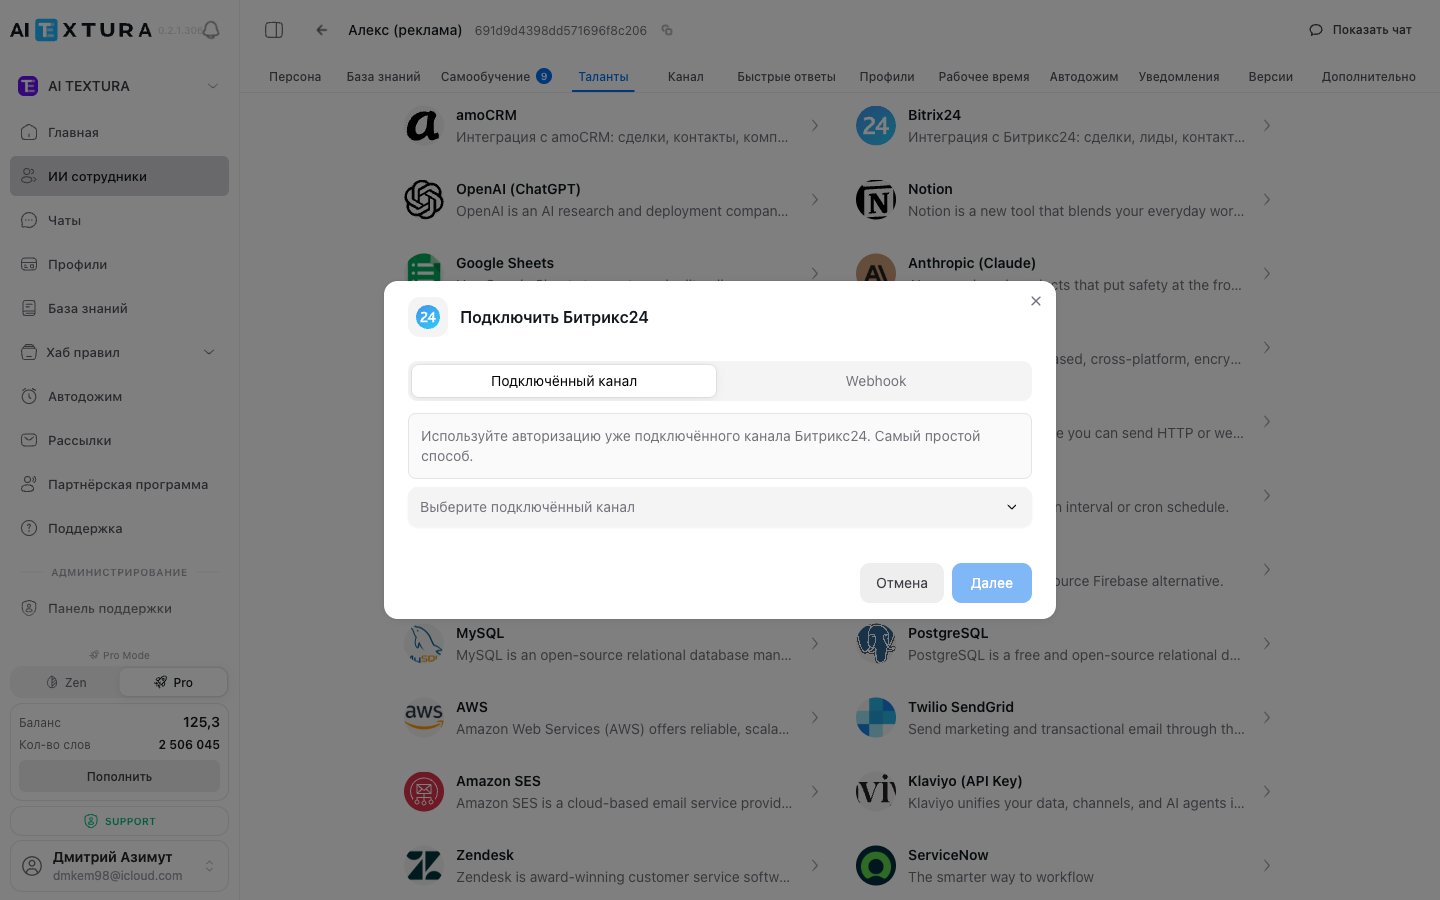
When you open the **"Connect Bitrix24"** modal in the Talents tab, two tabs are available:
#### 1. Connected channel (recommended)
If you already have a Bitrix24 **channel** connected (see above), the talent can reuse its authorization. This is the simplest path.
On the agent page, go to the **Talents** tab → **Browse apps**.
Find the **Bitrix24** card in the **Business Management** category and click on it.
From the dropdown, pick a previously connected Bitrix24 channel.
Click **Next** — the talent will appear in the **Connected** tab.
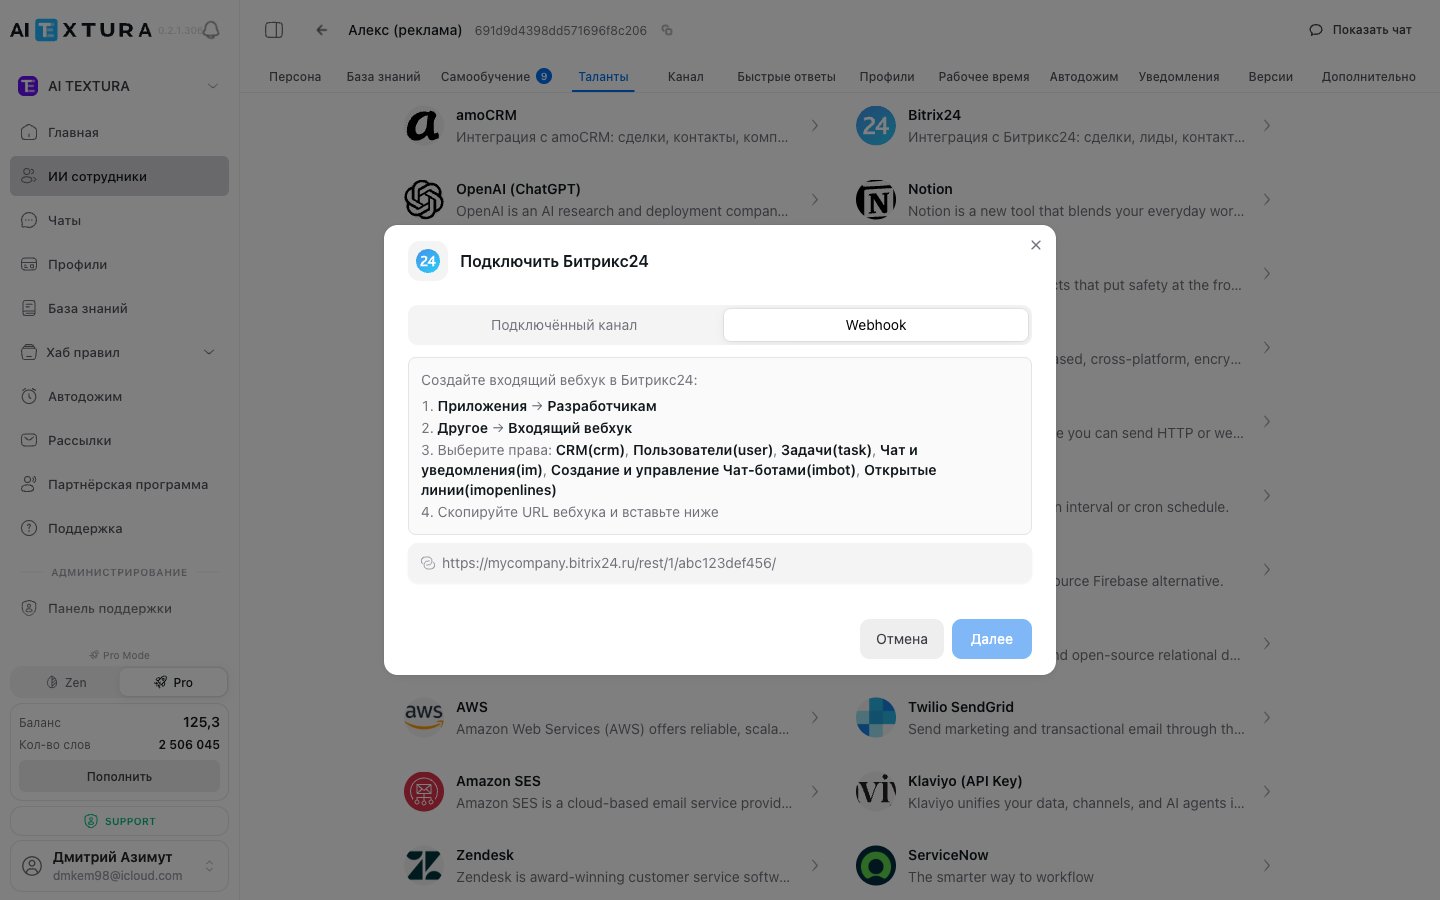
#### 2. Webhook (if no channel is connected)
If a channel is not yet connected, or if you need broader permissions, use a separate webhook dedicated to the talent.
Open **Applications → For Developers → Other → Inbound webhook**.
The talent needs broader permissions than the channel:
* **CRM** (`crm`) — deals, leads, contacts, companies, pipelines
* **Users** (`user`) — finding responsible managers
* **Tasks** (`task`) — creating tasks
* **Chat and notifications** (`im`) — sending messages
* **Chatbot creation and management** (`imbot`)
* **Open Channels** (`imopenlines`)
Copy "Webhook URL for calling REST API" from Bitrix24.
Return to the Bitrix24 talent modal → **Webhook** tab → paste the URL → **Connect**.
The Bitrix24 talent acts on behalf of the user whose webhook is connected. If that user has limited permissions inside Bitrix24, the talent will inherit the same restrictions.
***
## Assigning responsible managers
Once the Bitrix24 **talent** is connected, the AI employee can **assign responsible managers** to deals and leads on its own, right during the conversation — for example, routing a warm lead to a specific manager based on rules or workload.
### Video walkthrough
### How it works
See "Connecting Bitrix24 as a talent (MCP)" above — assigning responsible managers requires the `user` and `crm` permissions.
On the agent's **Persona** tab, specify whom to route the lead to: e.g., "If the customer asks about room reservations — assign manager Anna (ID 12) as responsible," or "For VIP service requests, set Ivan as responsible."
Open the agent's built-in test chat and simulate a customer inquiry. The AI should create a deal and immediately assign a responsible manager.
Give the AI clear context: segmentation rules, IDs or names of responsible managers, whether to create a new deal or look up an existing one. The more specific the instruction, the more consistent the result.
***
## Notifications via Bitrix24
In addition to channels and talents, Bitrix24 can also act as a **notification delivery channel**: a trigger fires, and the AI employee posts a message to a Bitrix24 chat for the responsible manager.
### Video walkthrough
For details on configuring triggers and notification delivery, see [Notifications](/en/guides/notifications).
***
## FAQ
It is not required, but recommended. The channel handles incoming messages from open channels; the talent handles CRM actions. If you only need conversations without CRM operations, the channel is enough. If you need CRM actions (deals, responsible managers, tasks), you need the talent.
Technically yes, if it has all the required permissions. But it's cleaner to keep webhooks separate: the channel — with minimal permissions for open channels; the talent — with broader permissions for CRM, Users, and Tasks.
No. Without the Bitrix24 talent connected, the AI employee has no access to CRM operations. The channel only forwards messages — it does not create deals automatically.
Check the webhook permissions in Bitrix24. The talent requires `crm`, `user`, `task`, `im`, `imbot`, `imopenlines`. The channel requires `imopenlines`, `imbot`, `crm`, `disk`. Also make sure the user who created the webhook has corresponding permissions for the matching Bitrix24 sections.
Make sure (1) the channel is active in AI Textura; (2) the "Assign chatbot as responsible" checkbox is enabled on the relevant open channel in Bitrix24; (3) the selected AI employee matches the one bound to the channel; (4) the employee is "Active" and on shift (see Working hours).

 ### Two connection options
When you open the **"Connect Bitrix24"** modal in the Talents tab, two tabs are available:
#### 1. Connected channel (recommended)
If you already have a Bitrix24 **channel** connected (see above), the talent can reuse its authorization. This is the simplest path.
### Two connection options
When you open the **"Connect Bitrix24"** modal in the Talents tab, two tabs are available:
#### 1. Connected channel (recommended)
If you already have a Bitrix24 **channel** connected (see above), the talent can reuse its authorization. This is the simplest path.